Add or Remove Power Button to Login Screen
If you’re running Windows 10 Pro, you can easily add or remove the power button from the login screen via Group Policy. Hit the Windows key and type: gpedit.msc and hit Enter.
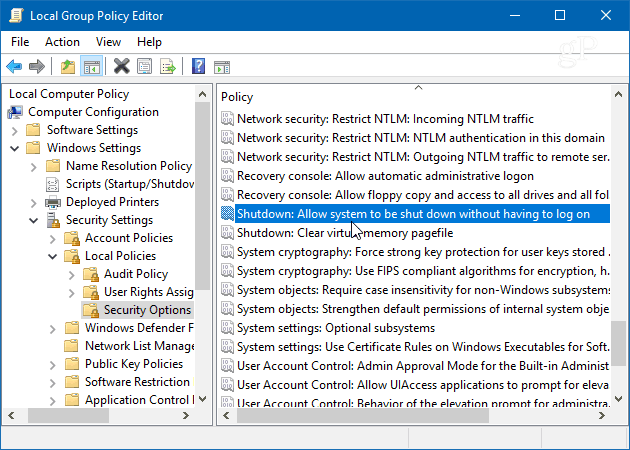
In Local Group Policy Editor head to Computer Configuration > Windows Settings > Security Settings > Local Policies > Security Options. In the right panel, find “Shutdown: Allow system to be shut down without having to log on” and double-click on it.
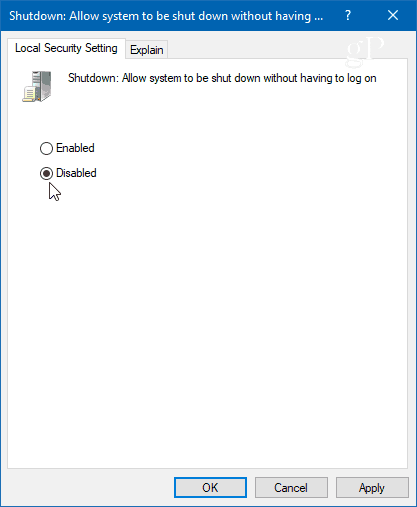
Then on the Local Security Setting tab, set it to either Enabled or Disabled and click OK and close out of Group Policy Editor.
On Windows 10 Home
Since Windows 10 Home doesn’t have the Group Policy feature, you will need to hack the Registry to add the power button. Hit the Windows key and type: regedit and hit Enter. Then head to the following path: You’ll need to create a new key and name it shutdownwithoutlogon and set the Value to 1 if you want the button to display or 0 if you don’t want it on the login screen. Then close out of Registry Editor. You don’t need to log out or restart your system for it to take effect.
Just hit Windows key + L to lock your PC and hit Enter or swipe up for the login screen. There you will see a fully functional power button at the lower-right corner of the login screen.
Or, if you set the value to 0, the power button will no longer show up.
Whether you want to make it easier to shut down your Windows 10 PC without logging in or don’t want someone walking by turning off your PC, it’s good to know you can add or remove the power button accordingly. Comment Name * Email *
Δ Save my name and email and send me emails as new comments are made to this post.
![]()


