You have the ability to specify the amount of space that is displayed between the table cells, and modifying the amount of space can result in very different results. You can experiment with table cell spacing by using our tutorial below.
Insert Space Between Cells in Microsoft Word 2013
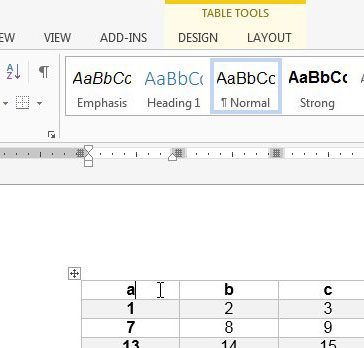
The steps in this article will modify the amount of space that is shown between the cells of your table. By default there is usually not any space between cells, so modifying this setting will drastically change the appearance of the table. You will also have the ability to specify the amount of space between cells, so you can choose to make the space as small or large as needed. Step 1: Open the document containing the table to which you want to add cell spacing. Step 2: Click inside one of the cells in the table to bring up the Table Tools menu.
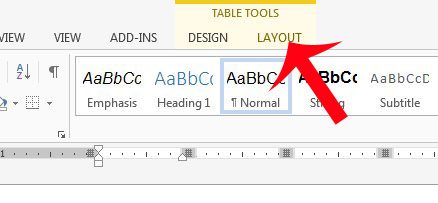
Step 3: Click the Layout tab under Table Tools at the top of the window.
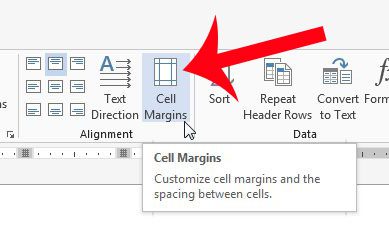
Step 4: Click the Cell Margins button in the Alignment section of the navigational ribbon.
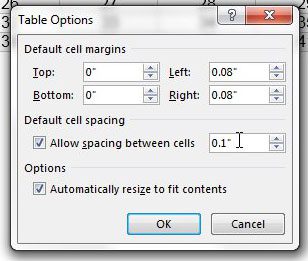
Step 5: Check the box to the left of Allow spacing between cells, then enter the amount of spacing that you want to use. Click the OK button to apply the changes. You may need to experiment with the amount of spacing a few times until you achieve your desired result.
Does your document have a footer that contains incorrect or unnecessary information? Learn how to edit a footer in Word 2013 and correct the problem. After receiving his Bachelor’s and Master’s degrees in Computer Science he spent several years working in IT management for small businesses. However, he now works full time writing content online and creating websites. His main writing topics include iPhones, Microsoft Office, Google Apps, Android, and Photoshop, but he has also written about many other tech topics as well. Read his full bio here.


