Excel can do this another way, too, if you don’t need everything to be the same height. Our how to expand all rows in Excel guide can show you how.
Set Multiple Rows to the Same Height in Excel 2010
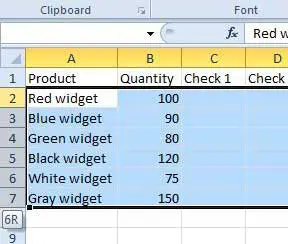
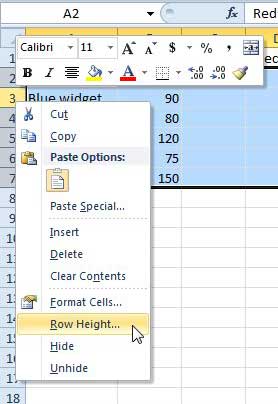
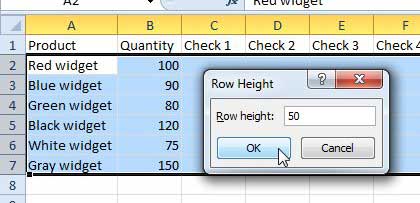
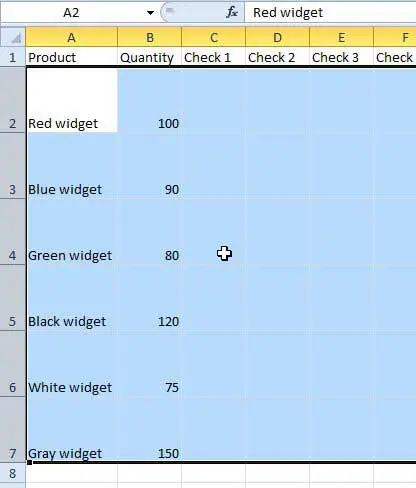
I mostly use this trick when I am printing out something that needs to be written on, such as a checklist. The default row height in Excel is very small, and is usually difficult for writing. But if you follow the steps below to make your rows larger, it makes for a much handier checklist. Step 1: Open your spreadsheet in Excel 2010. Step 2: Click the number to the left of the first row whose height you want to change, then drag your mouse down to select the rest of the rows. Step 3: Right-click one of the selected rows, then click the Row Height option. Step 4: Enter a value into the Row height field, then click the OK button. Your selected rows will change to the height that you just entered, as in the image below. Learn more about changing row, column and cell sizes in Excel 2010. After receiving his Bachelor’s and Master’s degrees in Computer Science he spent several years working in IT management for small businesses. However, he now works full time writing content online and creating websites. His main writing topics include iPhones, Microsoft Office, Google Apps, Android, and Photoshop, but he has also written about many other tech topics as well. Read his full bio here.
You may opt out at any time. Read our Privacy Policy


