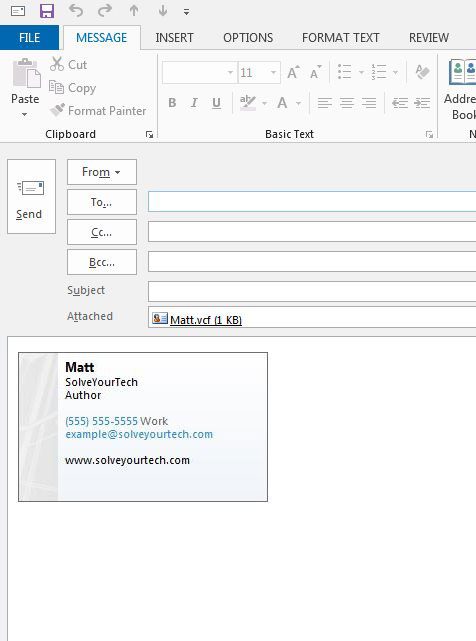
Fortunately this will seem very familiar if you have previously created a contact in Outlook 2013, or included an attachment with an email. So continue reading below to learn how to create and send a vCard to a contact in Outlook 2013.
How to Create a Business Card in Outlook 2013
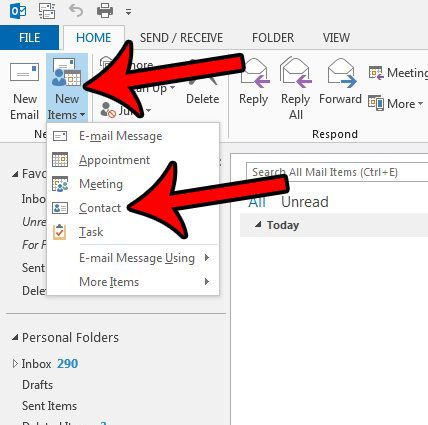
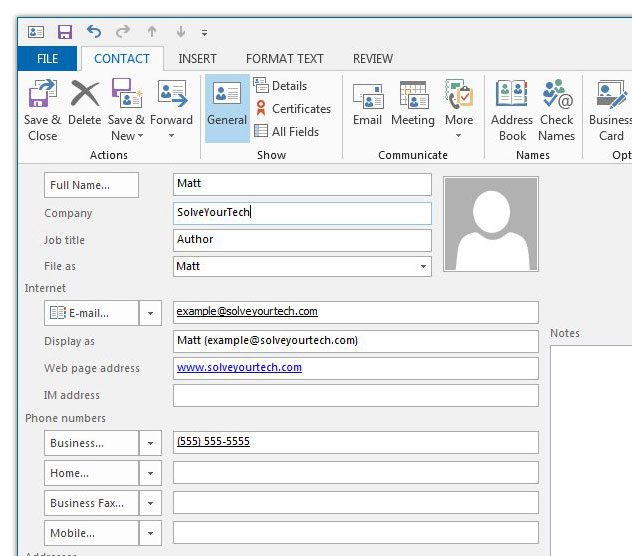
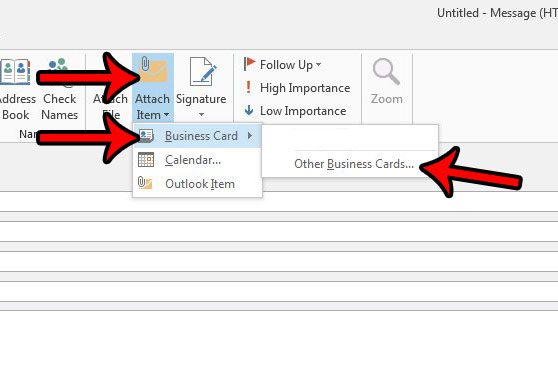
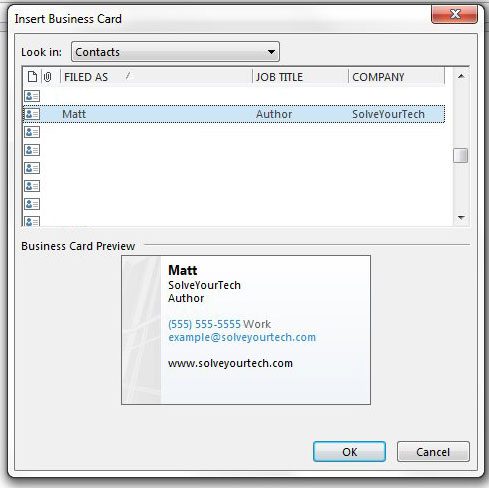
The steps in this guide will show you how to create a vCard in Outlook 2013. This is the digital business card format for Outlook, and when you forward this information to a contact, it will be included as a .vcf file type. This guide will assume that you do not already have a contact set up for yourself in Outlook 2013. If you’re looking for other ways to make use of Outlook’s contacts features, check out distribution lists. Step 1: Open Outlook 2013. Step 2: Click New Items in the ribbon, then click the Contact option. Step 3: Fill in all of the information that you can to include on your vCard, then click the Save & Close button. Step 4: Include your vCard as an attachment to an email by opening an email, clicking Attach Item, then Business Card, then Other Business Cards. Step 5: Select your vCard from the list of contacts, then click the OK button. You can then complete your email and send it. Note that your vCard will be included in the Attached field. Would you like Outlook to check for new messages a little more often? Learn how to change the send and receive frequency in Outlook 2013 and adjust the interval for how long the program will wait before it connects to your email server. After receiving his Bachelor’s and Master’s degrees in Computer Science he spent several years working in IT management for small businesses. However, he now works full time writing content online and creating websites. His main writing topics include iPhones, Microsoft Office, Google Apps, Android, and Photoshop, but he has also written about many other tech topics as well. Read his full bio here.
You may opt out at any time. Read our Privacy Policy
