Schedule Email Delivery in Outlook 2013
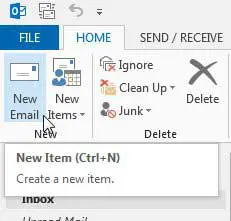
One important thing to remember when you are delaying delivery is that Outlook needs to be open to send the email. If you close Outlook before the time that you have scheduled the email to be delivered, then it will not send until the next time you open Outlook. Step 1: Launch Outlook 2013. Step 2: Click the Home tab at the top of the window, then click the New Email button in the New section of the ribbon.
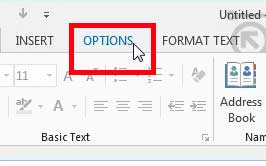
Step 2: Click the Options tab at the top of the message window.
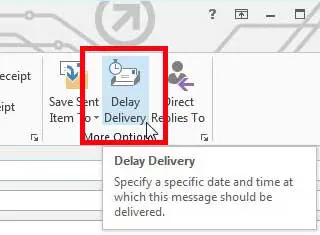
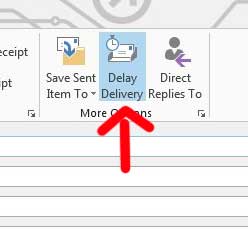
Step 3: Click the Delay Delivery button in the More Options section of the window.
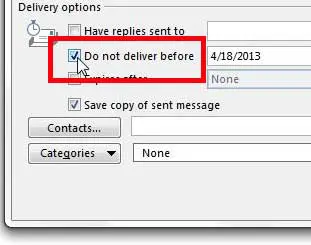
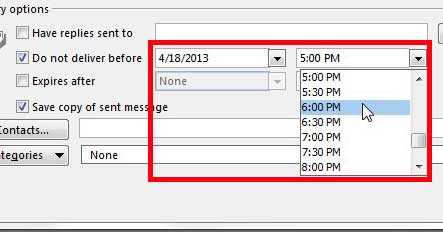
Step 4: Check the box to the left of Do not deliver before in the Delivery Options section of the window.
Step 5: Select the date and time at which you want the email to be sent.
Step 6: Click the Close button. You will note that the Delay Delivery button remains blue after you have done this.
Step 7: Fill in all of the details for the email, then click the Send button. The email will then remain in your Outbox until the time that you specified. Again, remember that Outlook must be open at the time that you specified for the email to be sent. We have previously written about how to delay delivery in Outlook 2010 as well. Setting up email on an iPad Mini is a great way to access your email without having to open a computer. Click here to read more about the iPad Mini or read reviews from owners. After receiving his Bachelor’s and Master’s degrees in Computer Science he spent several years working in IT management for small businesses. However, he now works full time writing content online and creating websites. His main writing topics include iPhones, Microsoft Office, Google Apps, Android, and Photoshop, but he has also written about many other tech topics as well. Read his full bio here.
You may opt out at any time. Read our Privacy Policy
