Word 2013 has a button that you can use to quickly add the date or time (or a combination of the two) to your document. You can even choose to configure this information so that it updates automatically within the document. This can help to take the burden of remembering to change that information from the hands of the person editing the document.
How to Add the Date and/or Time to a Document in Word 2013
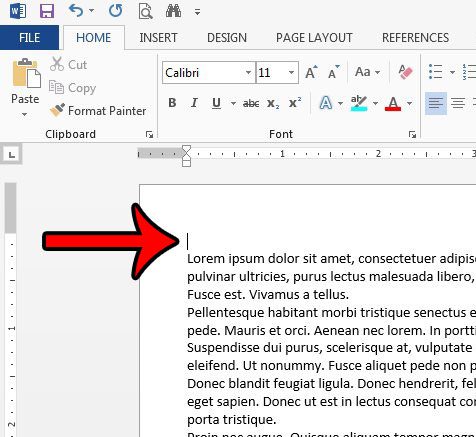
The steps in this guide were performed in Microsoft Word 2013. The end results of this tutorial will include a date or timestamp that is is added to the body of your document. You can select from several different formatting options to find the ideal formatting for this information. Step 1: Open the document in Word 2013. Step 2: Position your mouse in the location where you wish to insert the date and/or the time.
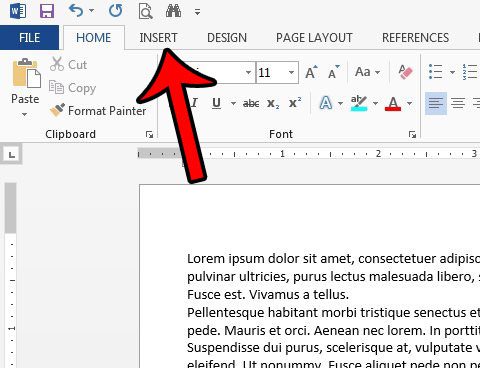
Step 3: Click the Insert tab at the top of the window.
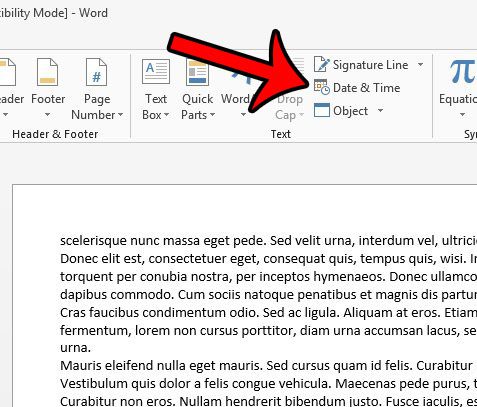
Step 4: Click the Date & Time button in the Text section of the ribbon.
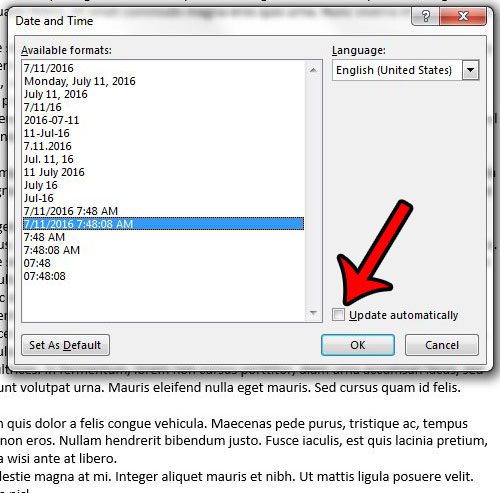
Step 5: Select the date and time format from the list at the left side of the window. You can also check the Update automatically box at the right side of the window if you would like this date and time to automatically update when the document is opened. Once you are finished, click the OK button to insert the time and date.
Do you use Microsoft Word to make lists or tables? If so, then the ability to insert a check mark into your document could come in handy. This article – https://www.solveyourtech.com/insert-check-mark-word-2013/ – will show you how to find a check mark symbol and insert it onto a page. After receiving his Bachelor’s and Master’s degrees in Computer Science he spent several years working in IT management for small businesses. However, he now works full time writing content online and creating websites. His main writing topics include iPhones, Microsoft Office, Google Apps, Android, and Photoshop, but he has also written about many other tech topics as well. Read his full bio here.
You may opt out at any time. Read our Privacy Policy


