Most apps require periodic updates, either as they add new features, or fix existing problems. You can usually continue to use the older version of an app, but you might not have the optimal experience if you do so. Luckily it’s possible for you to simultaneously update all of your iPad apps at the same time so that you don’t need to spend hours doing all of the updates individually.
How to Update All of My iPad Apps at the Same Time
Our guide continues below with additional information on how to update multiple iPad apps, including pictures of these steps. One of the more popular activities to do on an iPad is to find fun and exciting new apps. Many of them are free, and they can offer interesting new utilities or games to pass the time. But, as problems with an app are found or new features are added, those apps will need to be updated. However, updates are not installed automatically, so you need to handle the updates yourself. But if you do not perform the updates as soon as they are available, you could potentially need to install a lot of updates. This can be a time-consuming process if you are installing each update individually but, fortunately, you can update multiple iPad apps at once. This feature makes the upgrade process much simpler and will help to avoid wasting a lot of time simply updating your existing apps.
How to Install All Available iPad App Updates (Guide with Pictures)
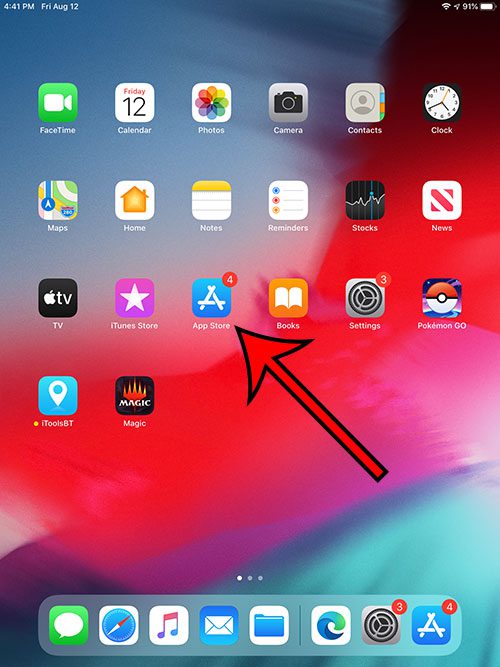
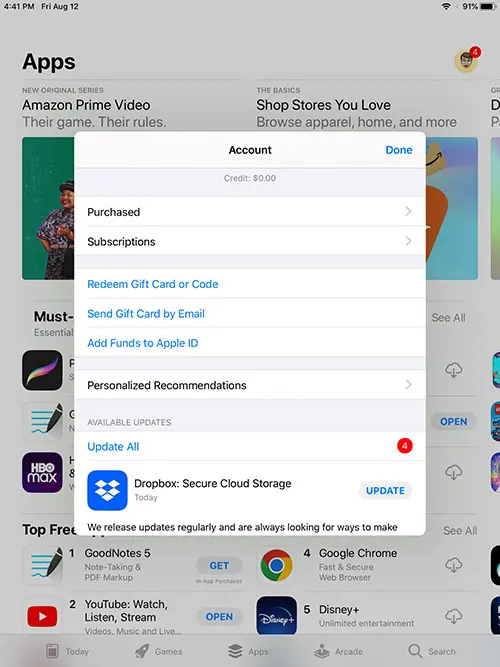
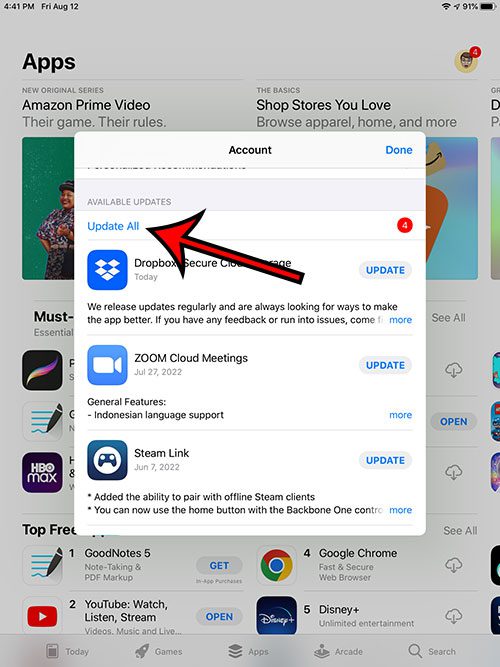
The steps in this section were performed on a 6th generation iPad, in the iOS 15 operating system. The next section discusses how to do this if you are using an older version of iOS and the screens above look different than what you see on your iPad. You can swipe down on the center of your Home screen and search for “app store” if you don’t see it. It’s the circular icon that has your picture inside of it. Note that you may not see anything here if all of your apps are currently up to date. You could also tap the Update button next to individual apps if you don’t want to update everything right now.
Old Method – How to Perform All iPad Updates at Once (Guide with Pictures)
If you do not have the option to update multiple apps at once, you may need to update your iOS software. You can do this by following the instructions in this article on Apple’s website. If you are questioning the need to update your apps, or if you actively avoid performing updates, then you may be wondering why it is important to keep your apps up to date. While there is not a single answer to this question, you can experience improved performance, fewer problems, and a better overall experience if you install updates that are available for your apps. While there may be rare exceptions where an update could create problems for an app, the majority of updates are a good thing for your device. You should try and ensure that you are performing a lot of large updates on a fast Internet connection, preferably where you do not have a data usage cap. Many update downloads can be large files and, if you are performing a lot of simultaneous updates, you could find yourself consuming GB of data to update all of your apps.*
Step 1: Return to the iPad’s home screen by pressing the Home button at the bottom of the iPad.
Step 2: Tap the App Store icon.
If you have updates to perform, there should be a small red circle with a number at the upper-right corner of the app icon that indicates the number of apps that need to be updated.
Step 3: Tap the Updates button at the bottom-right corner of the screen.
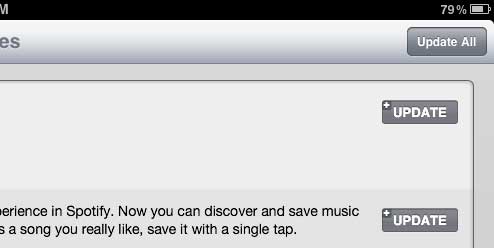
Step 4: Press the Update All button at the top-right corner of the screen.
Step 5: Type your Apple ID password into the password field, then press the OK button to proceed with downloading and installing all of the necessary app updates.
You will notice that there will be a black progress bar under each app that is being updated, letting you know the progress of the update for that app. Now that you know how to update all of your iPad apps at the same time you will be able to save yourself a lot of time if you had been doing them one by one in the past. There is also an option that lets you set up your iPad to take care of this on its own, which we discuss in the next section.
How to Enable Automatic App Updates on an iPad (Guide with Pictures)
If you don’t need to manually check anything about an app update, or if you don’t have apps that you want to prevent from updating, then you can turn on a setting that will let the iPad take care of all of this for you.
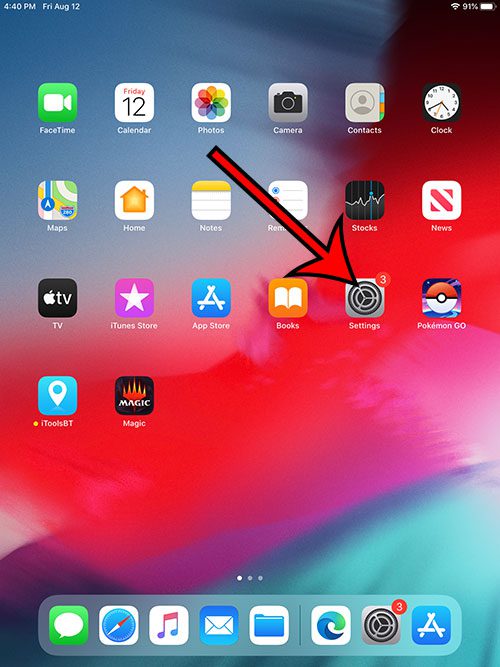
Step 1: Open the Settings app.
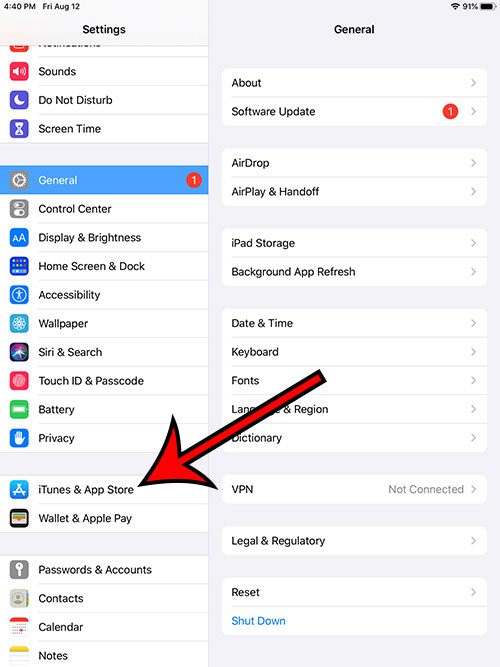
Step 2: Choose iTunes & App Store from the left column.
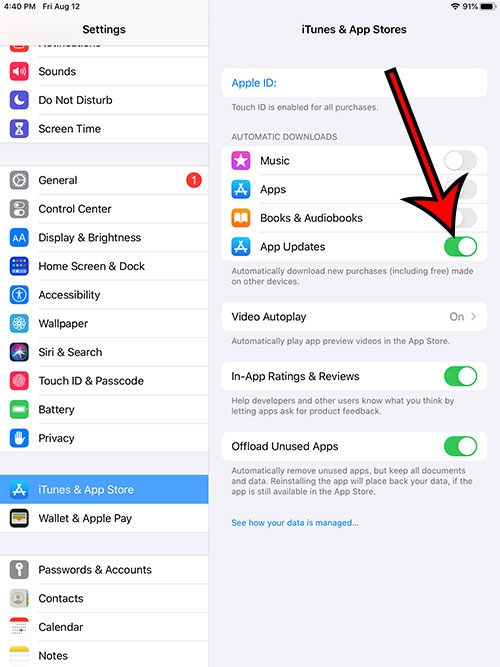
Step 3: Tap the button next to App Updates to turn it on.
Your iPad is now set up to install app updates as they become available in the App Store.
Additional Sources
If you have an app that you don’t wish to update, then you will need to disable the automatic app updates for the entire device and install the app updates manually. You can then select the You can always manually install an app update if you need to update the app and the iPad hasn’t handled it already. If the update isn’t working then your device may be low on storage. You can go to Settings > General > iPad Storage and check there. You may need to delete apps or files if you are almost out of space, as some app updates can be quite large.
After receiving his Bachelor’s and Master’s degrees in Computer Science he spent several years working in IT management for small businesses. However, he now works full time writing content online and creating websites. His main writing topics include iPhones, Microsoft Office, Google Apps, Android, and Photoshop, but he has also written about many other tech topics as well. Read his full bio here.
You may opt out at any time. Read our Privacy Policy
