You can access your Evernote account across a number of different devices, and you can create notebooks inside your account to organize your information. However, Evernote has another function that is also really cool. You can install and use the Evernote Web Clipper in your Google Chrome browser, which means that you can save text, Web pages and URLs of helpful or interesting information that you find on the Internet. This can be a real lifesaver if you know that you will need to access a particular page in the future but do not want to have to look for the page again. If you have Google Chrome save your passwords to fill them in automatically, then check out this saved passwords tutorial and find out how you can see the stored passwords in case you need to use them in another browser or on your phone.
Using the Evernote Web Clipper Google Chrome Add On (Guide with Pictures)
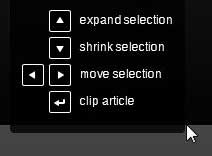
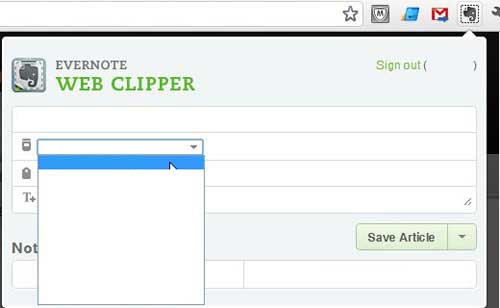
I signed up for an Evernote account a long time ago, but had really only used it sparingly. After a few months I found a really good use for it and it has since become one of my most-visited sites online. The Web Clipper only helps to further solidify how much I enjoy this application, and I think it is a great tool that many people could find useful for a lot of different reasons. To begin using the Evernote Web Clipper, you must first go to the Evernote Web Clipper download page, then download and install the add on for your browser. The page will automatically detect the browser you are using and serve up the appropriate add on for your browser, so be sure to visit the site while using Chrome. After the Web Clipper has been installed, a new Evernote icon will appear at the top-right corner of your browser. Browse to a Web page from which you want to clip content and store it in your Evernote account. Click the Evernote icon at the top-right corner of the window, then type your Evernote user name and password into their respective fields and log in. Evernote will automatically select the data on the page that it thinks you want to clip but, if you do not want to use that data, you can use the tools at the top-left corner of the window to select the appropriate information to clip. Once you have correctly selected your information, click the Notebooks drop-down menu to select the notebook in which to save the page, then add any necessary tags and comments. Once the clip is ready to save, click the Save Article button. You will notice that there is a drop-down menu to the right of the Save Article button that also gives you the option to Save Selection, Save Full Page or Save URL, if you prefer to take one of those actions instead. After receiving his Bachelor’s and Master’s degrees in Computer Science he spent several years working in IT management for small businesses. However, he now works full time writing content online and creating websites. His main writing topics include iPhones, Microsoft Office, Google Apps, Android, and Photoshop, but he has also written about many other tech topics as well. Read his full bio here.
You may opt out at any time. Read our Privacy Policy


