Windows Uninstaller Utility
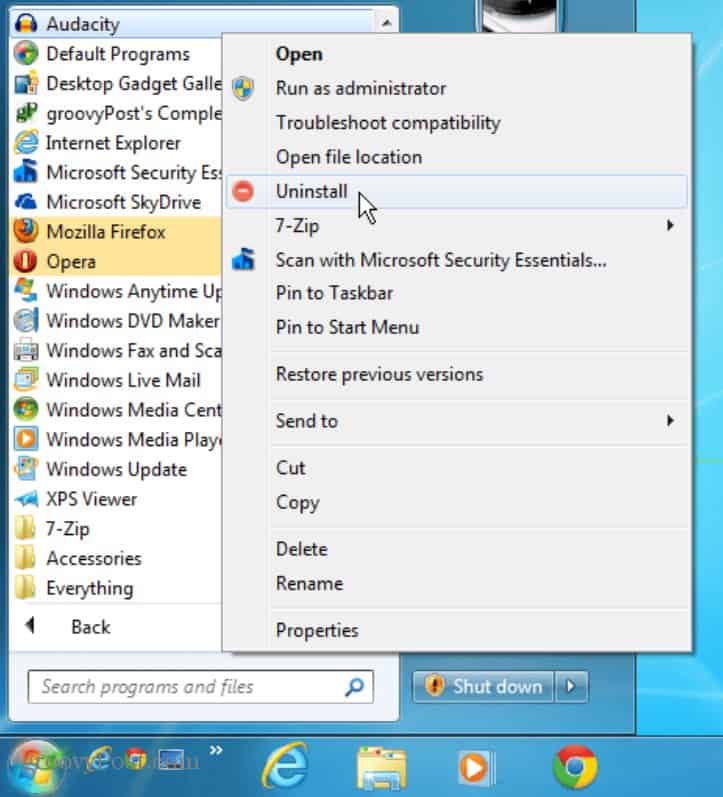
To get started, you will need to download and install the Windows Uninstaller app. Installation is straightforward following the wizard. Then all you need to do is right-click the desktop shortcut icon of the app you want to ditch and select Uninstall. There is no need to go deep through settings to uninstall items anymore.
Windows Uninstaller uses the program or app’s uninstaller. So you’ll need to click through its uninstallation wizard to get rid of the app. For example, in the show below, I’m uninstalling the Pale Moon web browser.
Another cool feature worth pointing out is that you can uninstall a program from the shortcut on the Desktop or the Start menu on Windows 7 and 8.1. However, it doesn’t work with the Windows 10 Start menu.
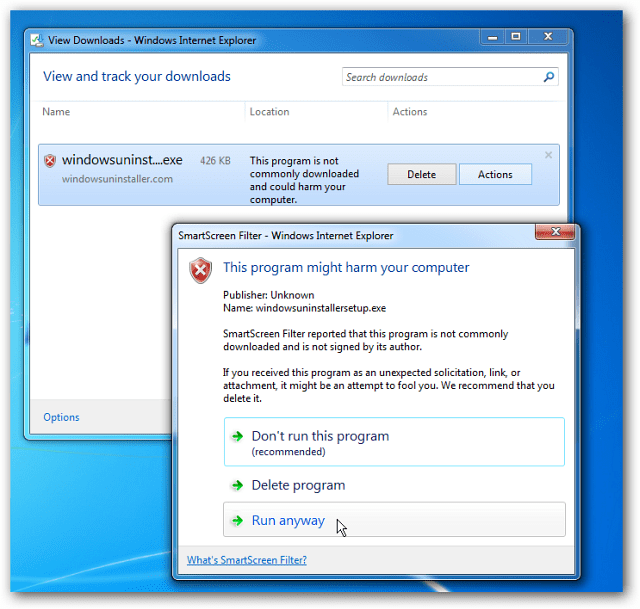
When I tried to install it on a Windows 7 computer via IE, I received a warning from the SmartScreen Filter. Go ahead and click Run Anyway; it’s a safe program and won’t harm your system. In fact, if you’re an experienced user and know what you’re installing, you can disable SmartScreen Filter.
Note: Windows 7 is no longer supported by Microsoft. Also, Windows 8.1 is reaching its end of support. Here is what the company says about Windows 8.1: While Windows Uninstaller is easier to use, it uninstalls programs just as if you were using the built-in Windows uninstaller. That means many times; there will be leftover temp files, folders, and registry entries. This might be good enough for some people, but other users want a clean OS without leftover junk. To get rid of all remnants of a program, follow my guide on how I completely uninstall software in Windows. Comment Name * Email *
Δ Save my name and email and send me emails as new comments are made to this post.
![]()


