However, there are a number of different options of the Do Not Disturb setting that you can configure. One of these options is whether or not the iPhone is silent just when the device is locked, or whether it is silent regardless of the lock status. If you find that your iPhone is still ringing, even with the Do Not Disturb feature enabled, then you will need to switch the “Silence” option to the “Always” setting by using our guide below.
Switching Do Not Disturb To Always Silent on an iPhone
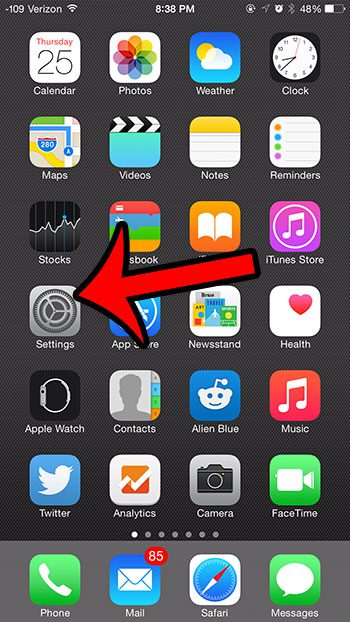
The steps in this article were performed on an iPhone 6 Plus, in the iOS 8.3 operating system. These steps are similar, however, for most other versions of iOS. If you are uncertain about the version of iOS on your iPhone, this article will show you how to find it. Step 1: Open the Settings menu.
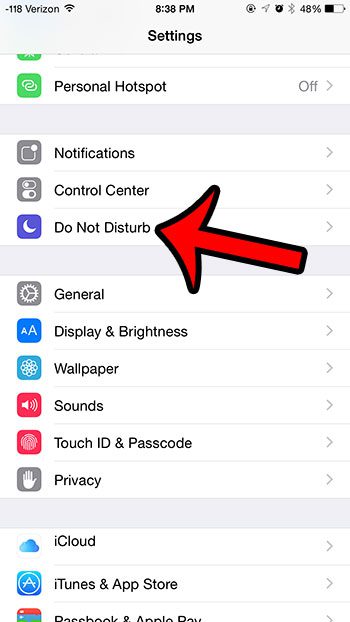
Step 2: Select the Do Not Disturb option.
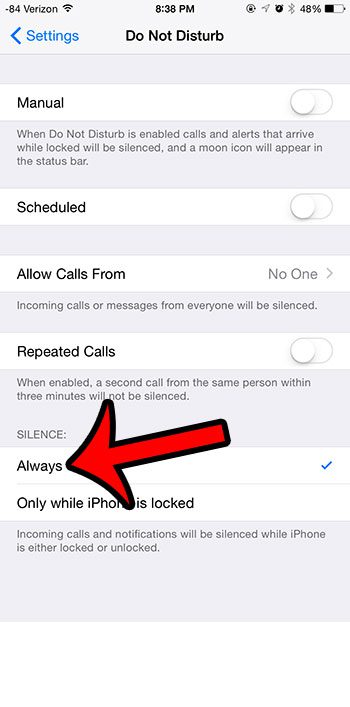
Step 3: Scroll down to the bottom of the screen, then select the Always option in the Silence section of the menu.
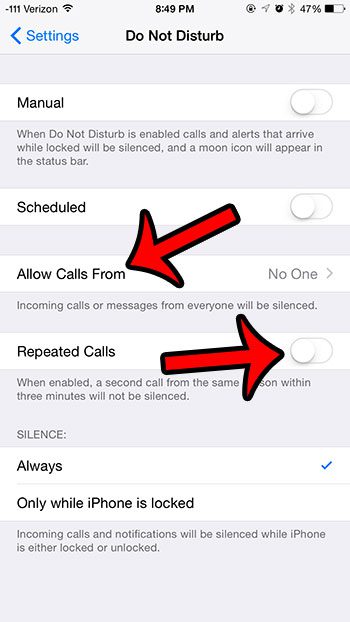
Now, whenever you put the iPhone into Do Not Disturb mode, whether it is via the Manual or the Scheduled option, then the iPhone will not make any noise when the phone rings, or when you receive a notification. Note that calls or messages can also come through if you have elected to allow calls from certain people, or if you have elected to allow repeat calls. You can adjust these settings by tapping either of the buttons below.
Would you like to be able to know who has sent you a text message without even looking at your phone? Learn how to set a custom text tone for a contact on your iPhone so that you can audibly distinguish the sender of a text message by the tone that is played. After receiving his Bachelor’s and Master’s degrees in Computer Science he spent several years working in IT management for small businesses. However, he now works full time writing content online and creating websites. His main writing topics include iPhones, Microsoft Office, Google Apps, Android, and Photoshop, but he has also written about many other tech topics as well. Read his full bio here.


